
When I first started developing in React, I thought that — in order to host a React app — it was required that I had a VPS to install Node.js. Additionally, I had always associated Apache with PHP, believing that only PHP apps could be deployed on an Apache server. However, now I realize that neither of these statements is true. In fact, it’s entirely possible to deploy and host a React app on an Apache web server; it’s even possible to do this on shared hosting. This article aims to outline this process for you so that you don’t fall into the same misconceptions that I did!
Step #1: Creating a React App
First of all, you need a React app. If you already have one then you can skip this step.
To create a new React app, I am going to use Create React App.
Create React App is a comfortable environment for learning React, and is the best way to start building a new single-page application in React. — React documentation
Install Create React App with the following command:
npm install -g create-react-app
Run this command to create a new React app called my-app:
npx create-react-app my-app
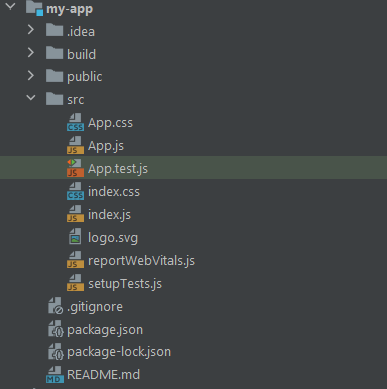
In the my-app folder you should now have the same files and folders displayed in the picture below:
You can now start coding and developing your React app!
The goal of this article is not to show you how to develop and build a React app. Rather, I will use a simple example of a three-page app from the React Router official documentation.
import React from "react";
import {
  BrowserRouter,
  Switch,
  Route,
  Link
} from "react-router-dom";

export default function App() {
  return (
    <BrowserRouter>
      <div>
        <nav>
          <ul>
            <li>
              <Link to="/">Home</Link>
            </li>
            <li>
              <Link to="/about">About</Link>
            </li>
            <li>
              <Link to="/users">Users</Link>
            </li>
          </ul>
        </nav>

        {/* A <Switch> looks through its children <Route>s and
            renders the first one that matches the current URL. */}
        <Switch>
          <Route path="/about">
            <About />
          </Route>
          <Route path="/users">
            <Users />
          </Route>
          <Route path="/">
            <Home />
          </Route>
        </Switch>
      </div>
    </BrowserRouter>
  );
}

function Home() {
  return <h2>Home</h2>;
}

function About() {
  return <h2>About</h2>;
}

function Users() {
  return <h2>Users</h2>;
}
Step #2: Configuring package.json
To allow Create React App to produce a running build, add the following property to your package.json file:
"homepage": "https://yourdomain.com"
As explained here, this will allow the Create React App to correctly infer which root path to use in the generated HTML file.
This is what the package.json file looks like:
{
  "name": "my-app",
  "homepage": "https://antonellozanini.com",
  "version": "0.1.0",
  "private": true,
  "dependencies": {
    "@testing-library/jest-dom": "^5.11.6",
    "@testing-library/react": "^11.2.2",
    "@testing-library/user-event": "^12.2.2",
    "react": "^17.0.1",
    "react-dom": "^17.0.1",
    "react-scripts": "4.0.0",
    "web-vitals": "^0.2.4",
    "react-router-dom": "^5.2.0"
  },
  "scripts": {
    "start": "react-scripts start",
    "build": "react-scripts build",
    "test": "react-scripts test",
    "eject": "react-scripts eject"
  },
  "eslintConfig": {
    "extends": [
      "react-app",
      "react-app/jest"
    ]
  },
  "browserslist": {
    "production": [
      ">0.2%",
      "not dead",
      "not op_mini all"
    ],
    "development": [
      "last 1 chrome version",
      "last 1 firefox version",
      "last 1 safari version"
    ]
  }
}
Step #3: Building the React App
Use this command to build your React app:
npm run build
As soon as the build process ends, a build folder will be created, ready to be deployed onto your Apache webserver.
Please note: if your React app involves frontend routing this is not enough as you need a .htaccess file. Create a .htaccess file and place it inside the public folder. This way, it will be automatically replicated into the build folder at the end of the build process.
Place the following line in your .htaccess file:
FallbackResource ./index.html
If users try to access a particular page directly without this configuration (for example https://yourdomain.com/about) a 404 error will be returned. This is because that URL does not map to anything in the file system of your server. FallbackResource ensures that index.html is loaded instead of allowing the frontend routing to be applied as expected.
Step #4: Deploying the React App
Now, you are ready to deploy your app! Upload each file from your build folder into your domain’s Document Root folder. Any FTP client, like Filezilla, will do. Et voilà!
![Home page [https://yourdomain.com/]](https://writech.run/wp-content/uploads/2023/09/image-1.png)
https://yourdomain.com/]![About page [https://yourdomain.com/about]](https://writech.run/wp-content/uploads/2023/09/image-3.png)
https://yourdomain.com/about]![Users page [https://yourdomain.com/users]](https://writech.run/wp-content/uploads/2023/09/image-2.png)
https://yourdomain.com/users]Bonus: Building for Relative Paths
If you want to deploy your application to a subfolder of your Document Root, you must follow these instructions. This also works for subdomains created using Virtual Hosts.
First, update the homepage property of your package.json file accordingly. Let’s assume you want to deploy your React app to the test subfolder, then your homepage property should be changed as follows:
"homepage": "https://yourdomain.com/test"
This is what the package.json file would look like:
{
  "name": "my-app",
  "homepage": "https://antonellozanini.com/test",
  "version": "0.1.0",
  "private": true,
  "dependencies": {
    "@testing-library/jest-dom": "^5.11.6",
    "@testing-library/react": "^11.2.2",
    "@testing-library/user-event": "^12.2.2",
    "react": "^17.0.1",
    "react-dom": "^17.0.1",
    "react-scripts": "4.0.0",
    "web-vitals": "^0.2.4",
    "react-router-dom": "^5.2.0"
  },
  "scripts": {
    "start": "react-scripts start",
    "build": "react-scripts build",
    "test": "react-scripts test",
    "eject": "react-scripts eject"
  },
  "eslintConfig": {
    "extends": [
      "react-app",
      "react-app/jest"
    ]
  },
  "browserslist": {
    "production": [
      ">0.2%",
      "not dead",
      "not op_mini all"
    ],
    "development": [
      "last 1 chrome version",
      "last 1 firefox version",
      "last 1 safari version"
    ]
  }
}
Then, you need to pass "/test" to the basename prop in <BrowserRouter>. This way, your app will be served from the specified subfolder.
This is what App.js would look like:
import React from "react";
import {
    BrowserRouter as Router,
    Switch,
    Route,
    Link
} from "react-router-dom";

export default function App() {
    return (
        <Router
            basename={"/test"}
        >
            <div>
                <nav>
                    <ul>
                        <li>
                            <Link to="/">Home</Link>
                        </li>
                        <li>
                            <Link to="/about">About</Link>
                        </li>
                        <li>
                            <Link to="/users">Users</Link>
                        </li>
                    </ul>
                </nav>

                {/* A <Switch> looks through its children <Route>s and
            renders the first one that matches the current URL. */}
                <Switch>
                    <Route path="/about">
                        <About />
                    </Route>
                    <Route path="/users">
                        <Users />
                    </Route>
                    <Route path="/">
                        <Home />
                    </Route>
                </Switch>
            </div>
        </Router>
    );
}

function Home() {
    return <h2>Home</h2>;
}

function About() {
    return <h2>About</h2>;
}

function Users() {
    return <h2>Users</h2>;
}
Now, you can follow steps 3 and 4 (from earlier on in this tutorial) and everything will work as expected!
You may also be interested in learning how to deploy a React application on Dokku.
Conclusion
Node servers are not required to deploy and host React apps, as I have just shown. This can be achieved without any kind of degradation, and it will also help in maintaining frontend routing. The procedure is easy and can be replicated even on shared hosting (although this can be a bit tricky for relative paths).
Thanks for reading! I hope that you found this article helpful.
