In this tutorial, we are going to explain how to send transactional emails with Sendinblue.
“Sendinblue is a comprehensive suite of SaaS communication tools, including email marketing, transactional emails, text messages, and more.” — Sendinblue’s official documentation
Sendinblue’s transactional email documentation recommends the use of their API clients, which are available and documented in: C#, Go, Java, Node JS, PHP, Python, and Ruby. What about Kotlin?
First of all, we need to understand what a transactional email is.
“A transactional email is an email that is automatically sent by your website to a single recipient resulting from a transaction or a specific event performed by that person, such as an eCommerce purchase or a password reset request.” — The Complete Marketer’s Guide to Transactional Emails
Now we are ready to dive into the tutorial.
Creating a New Sendinblue Account
Before anything else, we need an account with Sendinblue. Several plans are available, but we will use the free one, which comes with some limitations, as described in Is there a limit to the free plan?
You can create a new account on this page.
When you’ve done that, it’s time to get our Sendinblue API key, which is necessary to start calling Sendinblue API. You can retrieve your API key as described in the documentation under Get your API key.
Now, we can start writing some lines of code.
Installing the Sendinblue API Client
In order to send transactional emails in Kotlin, we need to install the Sendinblue API client.
If you are a Gradle user, add this dependency to your project’s build file:
compile "com.sendinblue:sib-api-v3-sdk:4.1.1"
Otherwise, if you are a Maven user, add the following dependency to your project’s build POM:
<dependency>
    <groupId>com.sendinblue</groupId>
    <artifactId>sib-api-v3-sdk</artifactId>
    <version>4.1.1</version>
    <scope>compile</scope>
</dependency>
The Sendinblue API client is now installed and ready to be used.
Defining a New Template Including Dynamic Content
Sendinblue allows users to define their own custom templates for designing emails. Templates support dynamic content, which can be filled with contact attributes (by default, a contact comes with the following attributes: EMAIL, FIRSTNAME, LASTNAME, SMS), predefined variables, and custom-defined transactional parameters.
The goal of this tutorial is not to show how to define a template in Sendinblue. So, to complete this step, following the official guide is highly recommended.
Please note: Do not forget to save the ID of the template you just created since we are going to use it in the next step.
Now we have all the required building blocks to send our first transactional email in Kotlin. Let’s see how in the next step.
Sending a Transactional Email
Time to see how can we send a transactional email in Kotlin. This can be easily achieved with the following lines of code:
import java.util.*
import sendinblue.ApiException
import sendinblue.Configuration
import sendinblue.auth.ApiKeyAuth
import sibApi.SmtpApi
import sibModel.SendSmtpEmail
import sibModel.SendSmtpEmailTo

object Sendinblue {

  fun sendTestEmail() {
    val sendinblueApiClient = Configuration.getDefaultApiClient()

    val apiKeyAuth = sendinblueApiClient.getAuthentication("api-key") as ApiKeyAuth
    apiKeyAuth.apiKey = "xkeysib-o1y..." // replace this with your API key

    val sendinblueSmtpApiInstance = SmtpApi()
    val sendinblueSendSmtpEmail = SendSmtpEmail()

    // defining template parameters
    val parameters = HashMap<String, String>()
    parameters["ORDER"] = "12345"
    parameters["DATE"] = "12/06/19"

    // defining to whom to send the transactional email
    val recipients = ArrayList<SendSmtpEmailTo>()
    val recipient = SendSmtpEmailTo()
    recipient.email = "thomas.bianchi@email.com" // replace this with the recipient's email address
    recipient.name = "Thomas Bianchi" // replace this with the recipient's full name
    recipients.add(recipient)

    sendinblueSendSmtpEmail.templateId(1) // replace this with your template id
    sendinblueSendSmtpEmail.to = recipients
    sendinblueSendSmtpEmail.params(parameters)

    sendinblueSmtpApiInstance.sendTransacEmail(sendSmtpEmail)
  }

}
Transactional parameters must be defined in a Map<String,String> object. A Map is a collection that holds pairs of <key,value> objects. In each pair, the key is the name of a parameter as defined in the template, and the value is the corresponding value we want to give to the selected parameter.
The Sendinblue API client requires a list of SendSmtpEmailTo objects, each of which represents one recipient.
Each recipient must have an email, while a name is optional. The former should be a contact registered in Sendinblue and assigned to a contact list, and the latter is the name that will be attached to the email recipient, which will appear in the email headers, but not in the email body.
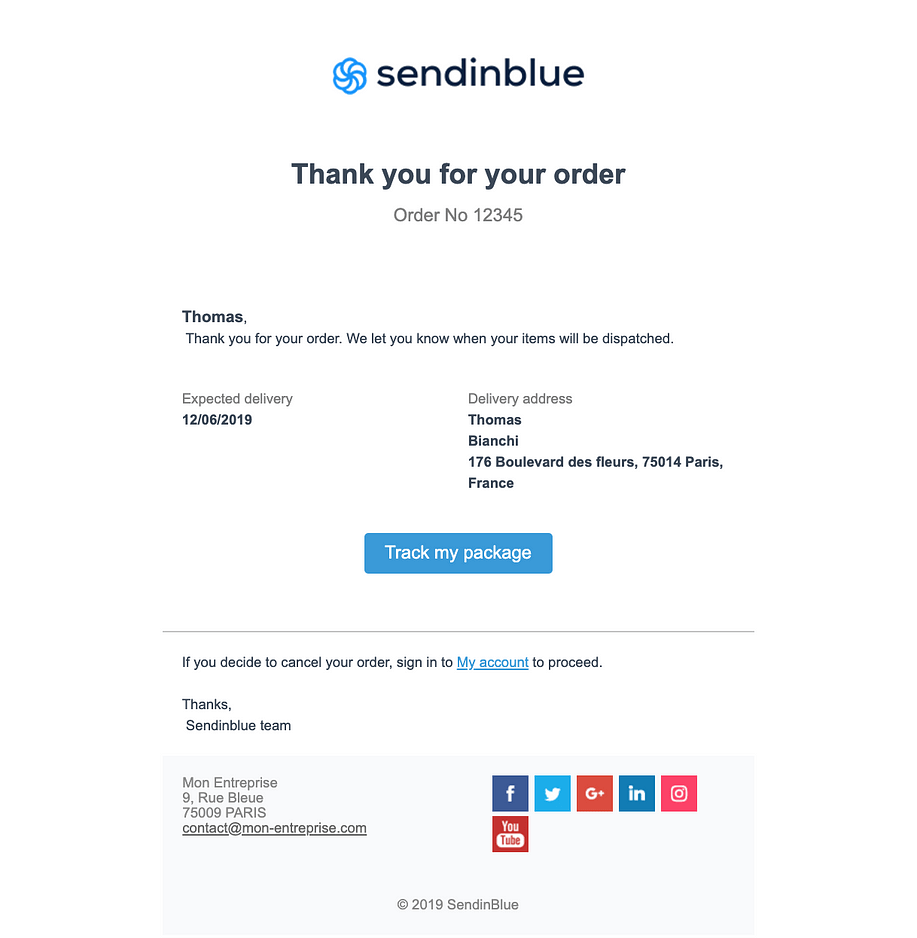
If you created a template as described in the previous step, this is the result you should get:

Extra
We have just seen how to send a transactional email with the official Sendinblue API client, but the same result can be achieved using the POST https://api.sendinblue.com/v3/smtp/email API.
Conclusion
In this tutorial, we showed how to send transactional emails in Kotlin. We managed to achieve our goal by harnessing the official Sendinblue Java API client and taking advantage of Kotlin’s peculiar feature of being interoperable with Java.
I hope that you found this article helpful — thanks for reading!