
I recently worked on a large Next.js project and deployed it to AWS Elastic Beanstalk. Everything worked fine, except for Next.js image optimization. Looking online for a workaround, I realized that this is quite a popular issue.
In fact, I read about many other developers who were having trouble getting the Next.js image optimization feature to work. Apparently, this is especially common when a platform other than Vercel is used to deploy a Next.js application.
Although it is popular, there is almost no documentation online. So, let’s see how to address this issue and make image optimization work as expected when deploying Next.js to AWS Elastic Beanstalk.
Diagnosing the Image Optimization Issue
To verify if the Next.js image optimization feature is working as expected, make sure to use the Next.js built-in <Image> component instead of the standard HTML <img> tag. Keep in mind that this feature is available only from Next.js 10.
Then, deploy your application to AWS Elastic Beanstalk.
Now, visit a web page containing at least one image rendered through the <Image> component and inspect it with your browser dev tools. You should be able to see something like this:
<img alt="Foo image" src="/_next/image?url=https%3A%2F%2FyourCDN.com%2Ffoo.jpg&w=1920&q=75" decoding="async" data-nimg="intrinsic" style="position: absolute; inset: 0px; box-sizing: border-box; padding: 0px; border: none; margin: auto; display: block; width: 0px; height: 0px; min-width: 100%; max-width: 100%; min-height: 100%; max-height: 100%;" srcset="/_next/image?url=https%3A%2F%2FyourCDN.com%2Ffoo.jpg&w=1080&q=75 1x, /_next/image?url=https%3A%2F%2FyourCDN.com%2Ffoo.jpg&w=1920&q=75 2x">
To make sure everything is working as expected, follow these steps:
1. Build the transformed image URL by concatenating your website URL with the <img> ‘s src attribute, as follows:
https://yourwebsite.com/_next/image?url=https%3A%2F%2FyourCDN.com%2Ffoo.jpg&w=1920&q=752. Extract the string contained in the url query parameter:
https%3A%2F%2FyourCDN.com%2Ffoo.jpg3. Decode it here to obtain the original image URL:
https://yourCDN.com/foo.jpg4. Compare the file of the image retrieved in step 1. with the file of the image retrieved in 3. If 1. is different from 3., then the Next.js image optimization feature is working as expected. Particularly, 1. should be in the WebP format (.webp extension) and significantly lighter than 3.
Solving the Next.js Image Optimization Issue
Let’s see the step-by-step guide on how to address the aforementioned issue with the Next.js image optimization feature when using AWS Elastic Beanstalk.
1. Adding sharp to your project’s dependencies
When using
next startin your production environment, it is strongly recommended that you installsharpby runningyarn add sharpin your project directory. This is not necessary for Vercel deployments, assharpis installed automatically. — next/image
As stated in the official documentation, the Next.js image optimization feature depends on the npm sharp library. But this is a Next.js optionalDependency and it may not be installed. Consequently, you should explicitly add it to your project’s dependencies with the following command:
npm install sharp
or the equivalent:
yarn add sharp
Now, while deploying your application to AWS Elastic Beanstalk, you may experience the following error message:
ERR! sharp EACCES: permission denied, mkdir '/tmp/.npm/_libvips' info sharp Attempting to build from source via node-gyp but this may fail due to the above error info sharp. Please see https://sharp.pixelplumbing.com/page/install for required dependenciesAs explained here, the solution involves creating a .npmrc file containing the following line:unsafe-perm=true
In particular, by setting unsafe-perm to true you will force npm to attempt to always run within the context of the running script. In other words, this option forces the package installer to never switch the current user and group. So, in the case of AWS Elastic Beanstalk, this means that the npm install process will be executed as root. This prevents you from having any kind of problem with permissions and makes sharp installation flawless.
2. Fixing /var/app/current/build/cache/images permissions
Installing sharp should be enough to solve the issue, but you may also encounter another problem. Specifically, if the image optimization feature is still not working, check the logs written by your Next.js app on AWS Elastic Beanstalk.
You might stumble across a message looking like this:
Dec 6 15:42:47 ip-VVV-XXX-YYY-ZZZ web: [Error: EACCES: permission denied, mkdir '/var/app/current/build/cache/images'] {
Dec 6 15:42:47 ip-VVV-XXX-YYY-ZZZ web: errno: -13,
Dec 6 15:42:47 ip-VVV-XXX-YYY-ZZZ web: code: 'EACCES',
Dec 6 15:42:47 ip-VVV-XXX-YYY-ZZZ web: syscall: 'mkdir',
Dec 6 15:42:47 ip-VVV-XXX-YYY-ZZZ web: path: '/var/app/current/build/cache/images'
Dec 6 15:42:47 ip-VVV-XXX-YYY-ZZZ web: }
This means that Next.js is trying to create a folder under /var/app/current/build/cache/images but it does not have the right permissions to do it. This is actually why the Next.js image optimization feature is not working. In fact, by delving into how it works, you will learn that it stores the generated transformed images into the cache/images folder inside build.
This is actually what the build/cache/images folder looks like on a fully working Next.js application.
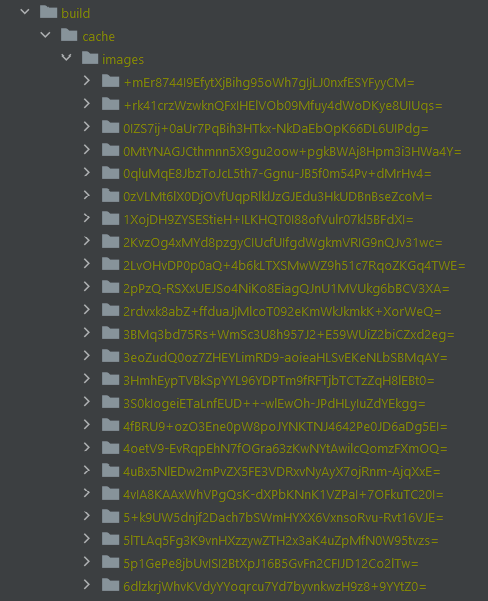
build/cache/images folder when Next.js image optimization worksIn other terms, to make the image optimization feature work, the Next.js application requires the read/write permission on the build/cache/images folder. To achieve this, create a bash build.sh file as follows:
#!/bin/bash

# Exit immediately if a command exits with a non-zero status
set -e

# deleting local.env.local to prevent Next.js from use it
rm -f ./.env.local

# building the Next.js application
npm run next:build

# creating the build/cache/images folder and give it
# the read/write permissions
mkdir -p build/cache/images
chmod -R 666 build/cache/images
Now, make sure that your package.json file contains the following “build” field under the “scripts” section:
"scripts": {
  "build": "./build.sh"
}
When the npm run build command is executed, the ./build.sh command will be launched and the build.sh script run as a result.
Et voilà! Your build script will now take care of creating the required build/cache/images folder with the right permissions. This should be enough to make the Next.js image optimization feature work as expected.
Conclusion
The image optimization feature introduced in Next.js 10 represents a great improvement that allows you to build modern and fast websites. On the other hand, making it work as expected when deploying your application to platforms different from Vercel can become a challenge. This is particularly true when dealing with AWS Elastic Beanstalk. Luckily, there is a solution, and showing how to address the most common issues related to that feature was what this article was about.
Thanks for reading! I hope that you found this article helpful.
